Showing posts with label Flower Soft. Show all posts

Saturday, December 5, 2020

Santa Gnome

Today I'm sharing another awesome image from KLM Digital Designs - this is Santa Gnome!  I have colored the image with Copics, then fussy cut it and mounted it on to a background I created with a Polkadoodle stencil and Distress inks.

Card Recipe
Skin - E01, E11
Red - R39, R59, RV69, RV99
Black - T6, T10
Beard - C1, C3
Fur, Trim - B0000, C1
White flock on suit trim
Polar White Flower Soft on hat trim and ball
Sky - Salty Ocean, Blueprint Sketch - Distress Inks
Trees - Mowed Lawn, Pine Needles - Distress Inks
Trunks - Gathered Twigs Distress Ink
Liquid Applique for snow on ground
Clear Glitter Glue on trees
Polkadoodles Winter Tree Stencil



Thursday, May 17, 2018

Party in the House!!!

Chick party alert!!!  Can you just picture the fun times this group has when they decide to party!!!


This adorable image is "One of My Peeps" from Stamping Bella, that I have colored with Copics and then added feather boas using Flower Soft, pearls using a Viva Decor pearl pen, and reflections on all of their sunglasses made with a white glaze pen.  Dots of clear stickles surround the colored image to add even more sparkle to the card!


Wednesday, March 7, 2018

Santa? Is that you?!!!

Today I am showing you all a card featuring Santa????  Maybe it is him, the hat seems to be the same one Santa wears at Christmas, but why is he dressed like a lumberjack!  Inquiring minds want to know - is it really the jolly old man or an imposter.  What do you think?


This adorable image is Woodland Santa (R098) from High Hopes rubber stamps and can be purchased here.  I have stamped the image with Memento Tuxedo Black ink on to Copic Xpress It cardstock, and then colored the image with Copic markers and Prismacolor pencils.  Some polar white flower soft and Nuvo Crystal Drops in Ebony Black give some added dimension to the card.  The image was fussy cut and then adhered to the card front that I created with My Favorite Things Mini Cloud Edges stencil and Mermaid Lagoon distress ink.

Card Recipe 
Copics - T1, T4, T7, E01, E13, E13, R20, R24, R29, R39, E40, E42, E43, E44, B91, B93, B95, B97, Y21, Y23, Y26, YG61, YG63, YG67
Prismacolor pencils - Dark Purple, Sandbar Brown, Grass Green, White, Black, Dark Brown, Burnt Ochre

Follow the One Crazy Stamper blog as the Design Team Divas will be bringing Daily Inspiration for the month of March. Don't forget to follow us on Facebook, Instagram and Pinterest.


Sunday, December 3, 2017

Beautiful Holiday Season


Wow here's another older card that I just loved making.  The image is from Sugar Nellie, and I colored her with Copic markers, then cut the image out with a Spellbinder die.  I made an oval easel card and added a Memory Box die, white Flower soft, Stampendous Frantage Embossing enamel, and touches of Wink of Stella clear and silver to the card front to complete the look.


Wednesday, November 15, 2017

Happy Holidays Penguin


Here's another card I colored up last year and just never had the time to post.  This is an adorable image from Whipper Snapper stamps called "Piccolo Penguin" that you can purchase here.  I colored the image with Copic markers and add A Spoonful of Snow from Stampendous for the glittery snow effect.  The sentiment die is from Impressions Obsessions and the candy cane border die is a Memory box item.


Sunday, November 12, 2017

Snow Flurries

Here's a card a did a year ago that I never got around to posting.  This is a cute image from Stamping Bella called "Merry Everything" and is available here.


The image was colored with Copic markers, and then I added Polar White flower soft to the pom poms, and some glitter to the globe ( which doesn't really show up on the photo).  The sentiment is included with the image.


Monday, November 23, 2015

Wishing You


One of my all time favorite images today.  I first colored this adorable penguin a couple of years ago, and recently decided that it deserved to be reinked and redesigned, so.......


This cutie is a retired stamp from Wild Rose Studios, that I have colored with Copics, then added polar white Flower soft details to the hat.  After fussy cutting I placing it on the card front featuring paper from my stash.  The star die is from Memory Box and the Warm Wishes die is from Frantic Stamper.


Sunday, November 1, 2015

Treasured Friends

I have always adored Whipper Snapper stamps, and now they are selling their images worldwide, so as soon as they became available I grabbed a few!!!!  Of course for those of you who know me, that means my newest collection is growing rapidly.


This is just one of several new images I just had to add -  it is entitled Winter Get Together.  I have colored it with Copics, then added Flower Soft Polar White and Liquid Embossing to create the look of snow.

Saturday, October 3, 2015

Beary Snowy

Mother Nature is giving us a taste of winter today - just a few snowflakes flying around, but the temperature is only 3 and the wind is brutal - brrrrrrrrr is all I can say!


Here's another card that I colored last year - amazing what you find in your old posts.  This adorable image is from Lili of the Valley that I colored with Copics.  The hat received a coat of Polar White Flower Soft to add some dimension, and a wood snowflake mounted in the corner of the card front, finishes off the card.

Wednesday, September 16, 2015

Freezin' Season Coming Soon!!


Well the weather here in Alberta has been a roller coaster the past week - Saturday was 29, Monday was a balmy 5, and today...... only Mother Nature knows!!!   Monday's weather definitely made me think of snow, so coloring this image was no problem.

 
This little cutie and her friend is Skating Snowlady from High Hopes rubber stamps and is available at One Crazy Stamper.  I have colored the image with Copic markers using the Colorless Blender to add dots to the scarf and mittens.  The blades of the skates received a coating of Wink of Stella silver, while the pompoms on the hats of both the skater and the little bird have Flower Soft Polar White details.  The sentiment from High Hopes rubber stamps is also available here, and I added Stickles to the ice that is part of the sentiment.
 
Card Recipe
Purples - V12, V15, V17
Teals - BG10, BG11, BG13
Pinks - R81, R83, R85
Snow - BG0000, RV0000, G0000, Colorless Blender
Blades - N1, N4
Skates - B0000, B00, Colorless Blender
Ground - C1
 
Today I wanted to take the opportunity to tell you all about this fabulous tool that is available to supplement your Copic coloring.  A couple of months ago, I started seeing a lot of coloring bloggers talking about this wonderful Hex Chart that Sandy Allnock designed featuring Copic markers  arranged by colors, not numbers.  Wow is all that I can say!!!!  This fabulous chart has opened a whole new world of options in color combinations that I would have never thought to use together.  Here's a sneak peek of what it looks like -


The chart is available to purchase through Sandy Allnock's website at http://sandyallnock.com/hexchart.  If you love coloring you will love this chart!!
 

Thursday, March 19, 2015

Thinking of You

The sun is shining, the small amount of snow we received on the weekend has long disappeared and spring is back, so thoughts turn to gardening.  The coming season is celebrated in today's card.

 
This beautiful image is Stamping Bella's Uptown Girl Winnie Peeking out the Window and is available at One Crazy Stamper here.  I have colored the image with Copics, added Flower Soft to some of the flowers, fussy cut it and then adhered it to a Couture Creations embossed card front.
 
Card Recipe
Skin - E00, E01, E11
Window Frame - C1, C3, C6, Colorless Blender
Big Flowers - B91, B95, B99
Drapes - B41, B52, B45, B93, B91
Leaves - BG93, BG96, BG99
Bird/Hair - E11, E15, E19
Bird Beak - Y28
Shirt - V12, V15, V17
Window Glass - B0000, B41


Sunday, February 1, 2015

Cute as a Ladybug


Ahh, the month of love has arrived which means that since it's a new month there is a new challenge at One Crazy Stamper, and for the theme we are asking you to show us your RED, WHITE AND A DIE CUT creations.

 
This cute little image is Ladybug Love from High Hope Rubber stamps, and I have colored it up with Copics, then fussy cut the image before placing it on a card base cut with a Spellbinder die.  The antennae are formed with paper clips from my stash, the center of the red flower has Black Flower soft added to it, and the white flowers are made with the Fabulous Phlox die from Memory Box.  Some Bazzill ribbon and a hand drawn sentiment finish off the card.
 
Card Recipe
Blacks - T5, T8, T10
Reds - R22, R24, R29, R39
Greens - G05, G09
Black Spots - 100


Sunday, November 2, 2014

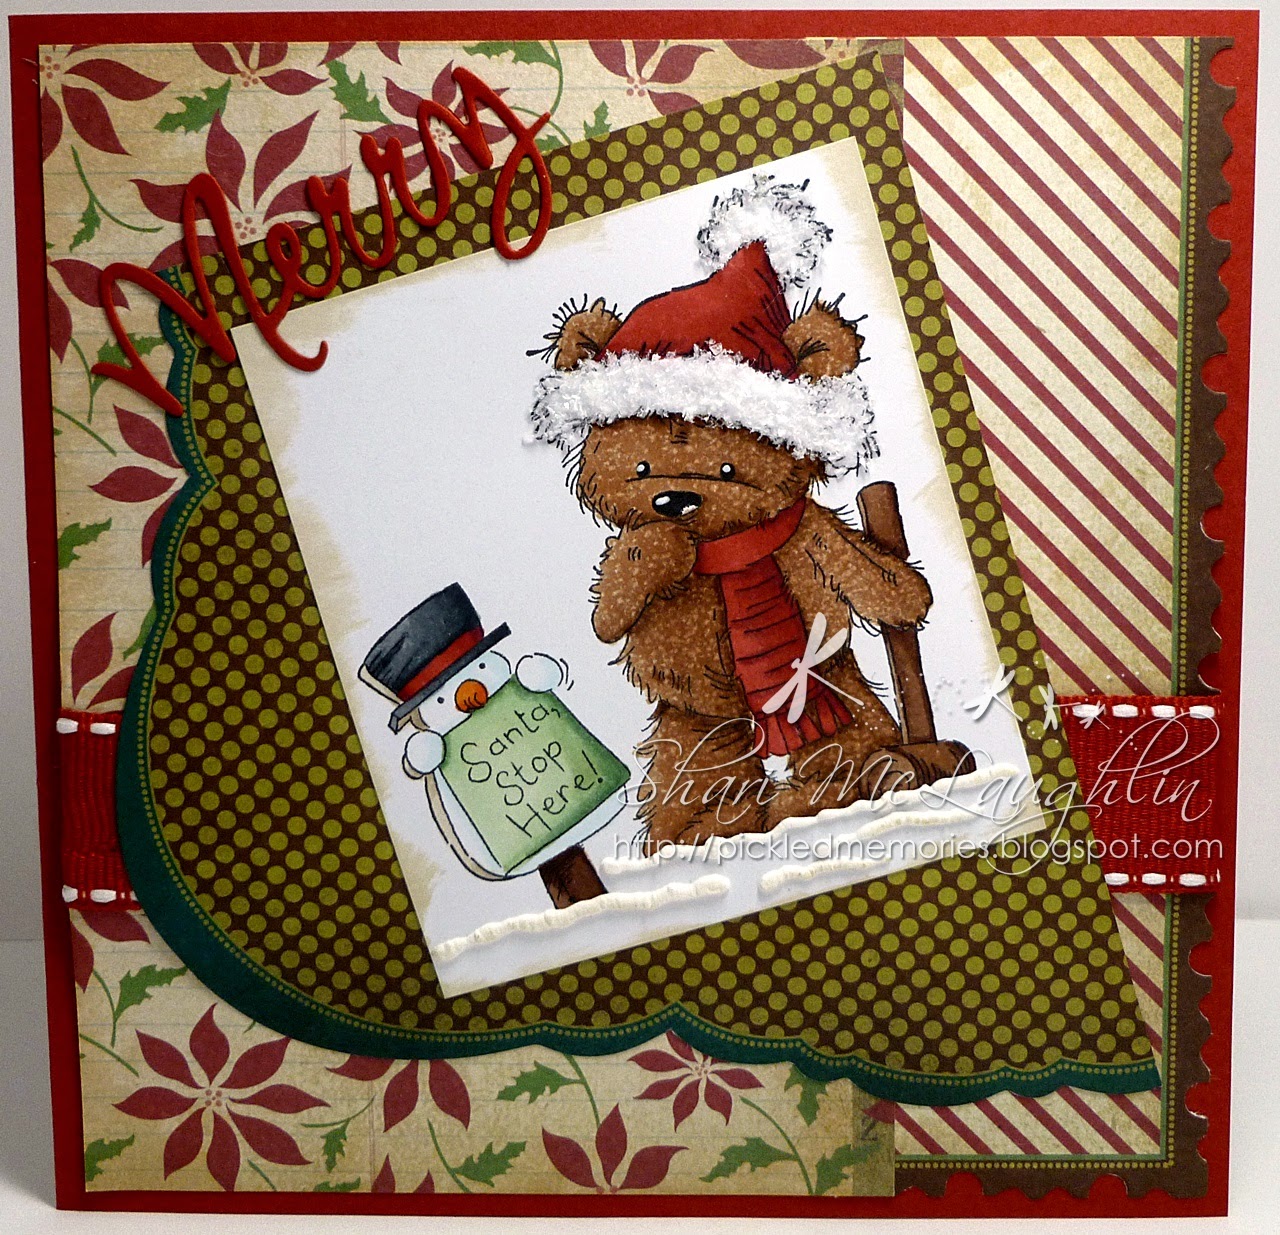
Santa Stops Here

The snow has finally stopped today, leaving a white glistening blanket everywhere, which has put everyone is the festive mood already!  Hard to believe that it was a beautiful +10 on Halloween, but now the push is on to get those Christmas cards made and ready to send out.

 
This sweet image is from Lili of the Valley - I have colored it with Copics ( using the terry cloth technique to get the realistic fur ), then matted it on the card front that features paper from my stash (meaning it's an oldie from Making Memories).  Some ribbon, Polar White Flower soft, white liquid applique, and the Merry die cut finish off the card.


Saturday, January 18, 2014

The Kid in Us All


Once again I have used my Copic markers to color today's card, which is another digital image from Sugar Nellie entitled "Penguin Party".


After the image was colored I used Polar White Flower soft on the fur of the hat, and added sparkle to the ribbon and presents with a Sakura Clear Star pen.


Tuesday, September 17, 2013

Santa's on His Way


It's Terrific Tuesday for One Crazy Stamper, and we are right in the middle of the monthly challenge theme of CHRISTMAS cards, so I'm here to show you my next creation using a new High Hopes Stamp called "Road Trippin' Santa".

 
I stamped the image on Copic Xpress It cardstock with Memento Tuxedo Black ink, and then colored it up with Copic Sketch Markers.  The fur on Santa's outfit received some Polar White Flower Soft, the candy centers of the tires of the car were coated with Stardust Stickles, and red, green and gold Viva Decor Pearl Pens highlight the berries, leaves and scroll on the car!  The dp is from Kaisercraft, and the snowflake is the Lindeman Snowflake die from Memory Box. 
 
Card Recipe
Reds - R29, R39, R59
Car - YG95, YG97, YG99
Golds - Y23, Y26, Y28
Blacks - N6, N8, N10
Skin - E01, E11
Blues - BG10, BG11, BG13

Hop on over to the One Crazy Stamper blog and check out the rest of the design teams wonderful Christmas creations, and then enter the challenge to win a great prize!

Monday, September 9, 2013

Snow Nice to Meet You!!!


Here it is as promised - another Lili of the Valley image on a delightful Christmas Card!!


This adorable image is "Snow Family" colored with my Distress Ink reinkers and a water brush, then mounted on a card front featuring dp from Carta Bella's Winter fun collection, and a Memory Box die.  The snow drops are finished off with a bit of sparkle created with Hampton's Art Clear stickles, and the pompoms received a touch of Polar White Flower Soft.

Saturday, August 18, 2012

Christmas Joy

I love Christmas and I really love penguins, so when I saw this new image from Art Impressions on the One Crazy Stamper online store, I knew I had to have it!!!
This is Penguin Joy, colored with Copics, accented with Polar White Flower Soft and diamond glaze, and mounted on dp from MME's Merry collection.


Doesn't this make you smile?

Have a wonderful day!!!

Thursday, December 1, 2011

Jolly & Glittery Little Santa

Wow, where did the year go?  Hard to believe that today is the first day of the last month of the year, and that Christmas is only 24 more sleeps away ( when the kids were small we counted down the sleeps until Santa arrived ).  Since it's the first of the month it's time for the next challenge at One Crazy Stamper and the theme is Winter/Christmas.
For this card I decided to use a technique that involves lots, and lots of messy glitter - it was time to get the animals all glittery for the upcoming season anyway!!  I stamped Jolly Little Santa from Whimsy Stamps on the front of a sheet of acrylic with Staz On Jet black ink.  Then working on the back side of the stamped image I put Art Glitter Designer Dries Clear adhesive on all of the parts of the image that I wanted to be either red, black, green or gold.  After applying the glue I sprinkled the selected color of Glitter Ritz on to the glue and shook off the access ( if you are going to try this technique run a used dryer sheet over both sides of the acrylic, it prevents some of the static ).  Once all of the glue dries I then applied Flower Soft Polar White Diamond range to the front of the card to make the fur trim ( use the same adhesive ).  Dp paper from Fancy Pants Saint Nick collection is on the inside of the card, and Whimsy Stamps Holiday Wishlist, stamped on kraft paper, and colored with Prismacolor pencils finishes the inside.  Ribbon and sentiment are from my stash.
I am entering this card into the following:
City Crafter - #85 Santa Claus is Coming