Thursday, April 23, 2015

Weekend Warrior

I have a card to share with you today as well as a quick tutorial, but first the card!
 

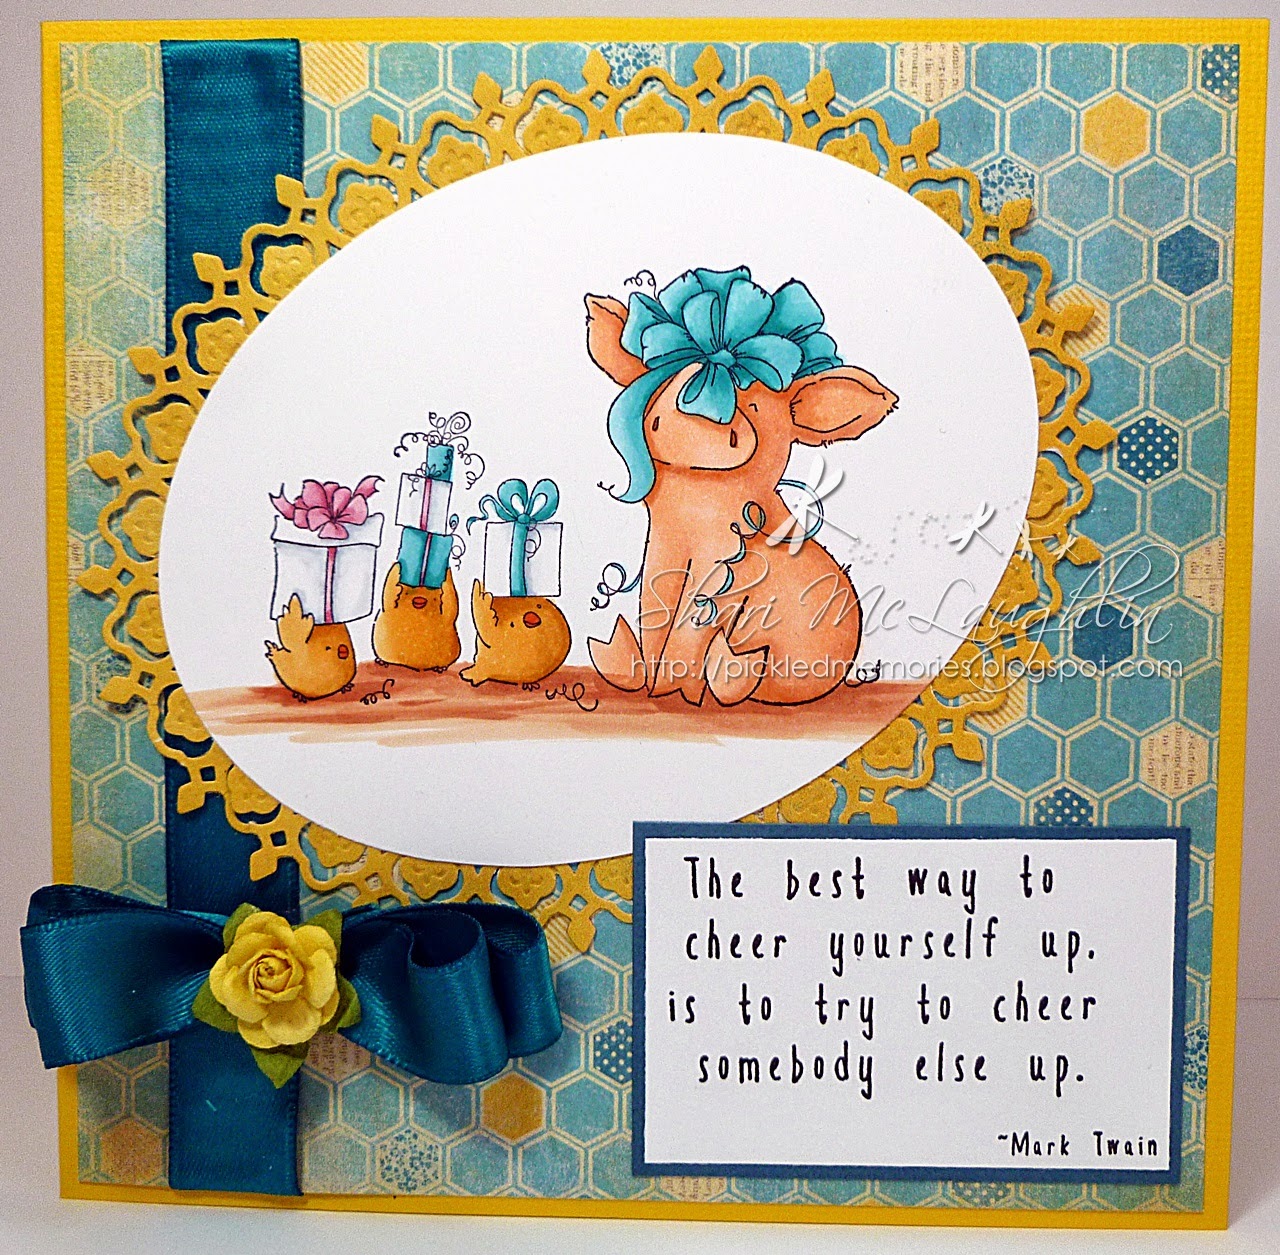
This would be a great card for the special man in your life, whether it be for a birthday, anniversary or Father's Day.  The image and sentiment are from the Art Impressions Weekend Warrior set that I have colored with Copics, then mounted it on dp from My Mind's Eye.  The ribbon and brads are from my stash.
 
Card Recipe
Skin - E01, E11, E13
Shirt/Hat - BG72, BG75, BG78
Pants/Hat - B21, B23, B24, B26
Gloves/Belt - Y21, Y23, Y26, Y28
Mask, Belt, Tools - W4, W7, W10
Drill - R24, R29, R39
Shadow under hat - C2
Ground - C2
Hat, Boots, Hammer Handle - E21, E23, E25
Background - YG61
 
Now here's my tutorial and it's for everyone out there who is tried of nozzles on adhesive bottles always being plugged.  All you need to fix the problem is some baby bottle nipples and a small piece of double sided foam tape.  What?!!!

Purchase baby bottle nipples that are silicone ( because the liquid will not stick to it ), will fit small bottles ( not the large size ), and are for 0+months in size.  My first attempt at buying the bottle nipples was wrong, so learn from my mistake and don't buy the brand Nuby Veri Flo Non-Drip kind - they have the wrong tip.  The Gerber brand pictured above is great!


After removing the original lid and cleaning off any old remnants of glue from around the neck of the bottle, tightly wrap one ( or two layers - this will depend of the width of the neck of the bottle - experiment and you will soon figure it out ) of the foam tape around the neck, then press it firmly around the neck.  Next stretch the baby bottle nipple over the tape until it is well seated around the rim, and then press firmly around the neck, sealing the bond between the nipple and the foam tape.
 
 
Now you are ready to use your new and improved bottle of adhesive with no plugs.
 
 
The other benefit is that you will be able to do thin lines of adhesive, or with more pressure you can thicken the lines.
Once you are done using the bottle just make sure to leave a small drop of the adhesive on the very tip of the bottle, which will dry and seal the hole.
 
 
The next time you need to use the bottle just flick off the dried adhesive on the tip and proceed to use.


So easy to do and you will love the result! 


Thursday, April 16, 2015

The Bestest Birthday Ever


Woo Hoo, Thursday has rolled around again which means it's my turn to showcase a project for One Crazy Stamper, and I have another adorable Petunia image today!!

 
Say hello to Petunia Has a Party from Stamping Bella!  I have colored the image with my trusty Copic sketch markers, then added sparkle with a Sakura Clear Star pen, and white dots around the image with a Sakura white Glaze pen.  After cutting and matting the image with a Spellbinder die, and inking the edges with either Spun Sugar, Victorian Velvet or Wild Honey distress inks, I then mounted it on the card front which features Authentique dp.  The sentiment is included with the image and finished off the card perfectly. 
 
Card Recipe
Petunia - E01, E11, E21, E97
Chicks - YR21, YR23, YR24, YR27 Beaks - E18
Bow/Hats - B32, B35, B37
Ground - W3, W6, W9


Thursday, April 9, 2015

Cheer Somebody Else Up


I simply adore these new images from Stamping Bella featuring Petunia the pig - who doesn't love an adorable pig!!

 
This cutie is Petunia Thinks She's a Prezzie and is available here at One Crazy Stamper.  I colored the image with Copic sketch markers, then cut it with a Spellbinder oval die, and matched that to one of the newer oval dies from Spellbinders to create the decorative border.  The sentiment is included with the image.  My dp is an oldie from my stash (Authentique), as is the ribbon and Prima flower.
 
Card Recipe
Petunia - E01, E11, E21, E97
Chicks - YR21, YR23, YR24
Bow - BG 53, BG 45, BG49
Whites - C1, C4
Ground - E11, E15, E21


Sunday, April 5, 2015

The More You....

Finally spent the day catching up on putting some recently colored images on to card fronts, and here is the first one - this stunning image is from Docraft's Simply Gorjuss Urban Rubber Stamps and is entitled "New Heights".

 
The image is colored with Copic markers, then fussy cut and adhered to the card front that features older Imaginisce paper and a Spellbinder diecut.  The wonderful sentiment is from Taylored Expressions "The Places You'll Go" stamp set, and the pearls in the corners were made with a Viva Décor Pearl pen.
 
Sugar Nellie - Gorjuss 2000 Party


Thursday, April 2, 2015

Spring Chicks


Spring has arrived here in southern Alberta - beautiful weather, plants are peeking out of the soil and the garden is calling my name. 
 
 
For my post for One Crazy Stamper today I have colored up this adorable Stampendous image called Sharing which is available here.  Once the image was stamped on Copic Xpress It cardstock with Memento Tuxedo Black ink, I used Copic markers to color it.  The image was matted and placed on a card front that features paper, ribbon and a sentiment all from my stash.
 
Card Recipe
Flowers/Chicks - Y11, Y13, Y21, Y26
Mouse - E00, E01, E21, E42, E43, E44
Bowl - C0, C2, C5
Ground - E70, E71, E77
Seeds - V21, V23, E31, E35, E08, Y17

Wednesday, April 1, 2015

Happy Easter

April has arrived bringing it with sunshine and warm weather, and to the delight of the children the Easter bunny will soon be leaving wonderful surprises for them all.  It's a new month so a new challenge has started at One Crazy Stamper with the popular theme of Anything Goes.

 
Today's card features a cute image from High Hopes rubber stamps called Peeking Spring Bunnies, which I colored with Copic markers, fussy cut, and placed on the card front with paper, and a sentiment from my stash.
 
Card Recipe
Pinks - R81, R83, R85
Blues - B00, B01, B02
Greens - G00, G02, G05
Yellows - Y00, Y04, Y08
Mouth - 100
Center of Flower - E37
Inside of Bunny Ears - R81, Colorless Blender