Showing posts with label Spellbinder die. Show all posts

Thursday, January 18, 2018

Rose Bella

When Stamping Bella first announced their flower girl line of stamps I knew I was in trouble, because really, who does not love flowers!  The line continues to grow and I continue to purchase them.  This beauty is "Tiny Townie Garden Girl Rose available here.


I colored the image with Copics and then added Prismacolor pencils for added depth and dimension.  The rose die is from my stash, while the square die is from Spellbinders.  The ink edging and the sentiment were stamped with a Ranger Distress Oxide ink (love the chalk finish of these inks).  The image was fussy cut and placed on the card front.



Sunday, May 3, 2015

Painted Greeting

Time for a break from studying, plus I just finished writing the sixth quiz for the online Medical Terminology class that I am attempting, so what better way to relax then to post a recent card that I made. 
 
This great image is from Lili of the Valley and is entitled A Lick of Paint.
I have colored it with Copics to match the designer paper, then cut and matted it with a Spellbinder die.  The ribbon and buttons are from my stash, and the Happy Birthday saying is also a die from Spellbinders.


Have a great day!!!

Friday, May 1, 2015

Sparkle


Wow, May is here already!  We are experiencing a really beautiful and early warm spring here is southern Alberta - plants are already poking there buds out of the ground and trees are sprouting new leaves everyday - loving it!!!
 
It's time again to usher in a new month with the new challenge at One Crazy Stamper, and we are once again asking folks to show us their Anything Goes projects ( just make sure you use a stamped image as digital images are not allowed ).  There is a great prize awaiting the winner of the monthly challenge.  For all the details just click here.


This adorable image is Play Time from Little Darlings Saturated Canary line of stamps.  After stamping the image on Copic Xpress It cardstock with Memento Tuxedo Black ink, I colored her up with Copics.  The ruffles on her skirt received highlights of shimmer with a Sakura Stardust pen, then I cut the image out with a Spellbinder die.  The card base was created with several sizes of Spellbinders, the edges of all the layers was inked with a Ranger Walnut Stain Distress ink pad, and the sentiment is from my stash.
 
Card Recipe
Skin - E000, E00, E02
Cheeks - R20
Eyes - B00, B02
Dress - R22, R24, R27, R29
Balls - B00, B02, B05
Balls & Boots - YG91, YG93, YG95
Bear, Dots, Hearts, Top of Boots - R11, R12, R14
Book, Bear tummy & snout - YG0000, YG01, YG03
Hair - E23, E25, E27, E29
Ground - E30


Thursday, April 9, 2015

Cheer Somebody Else Up


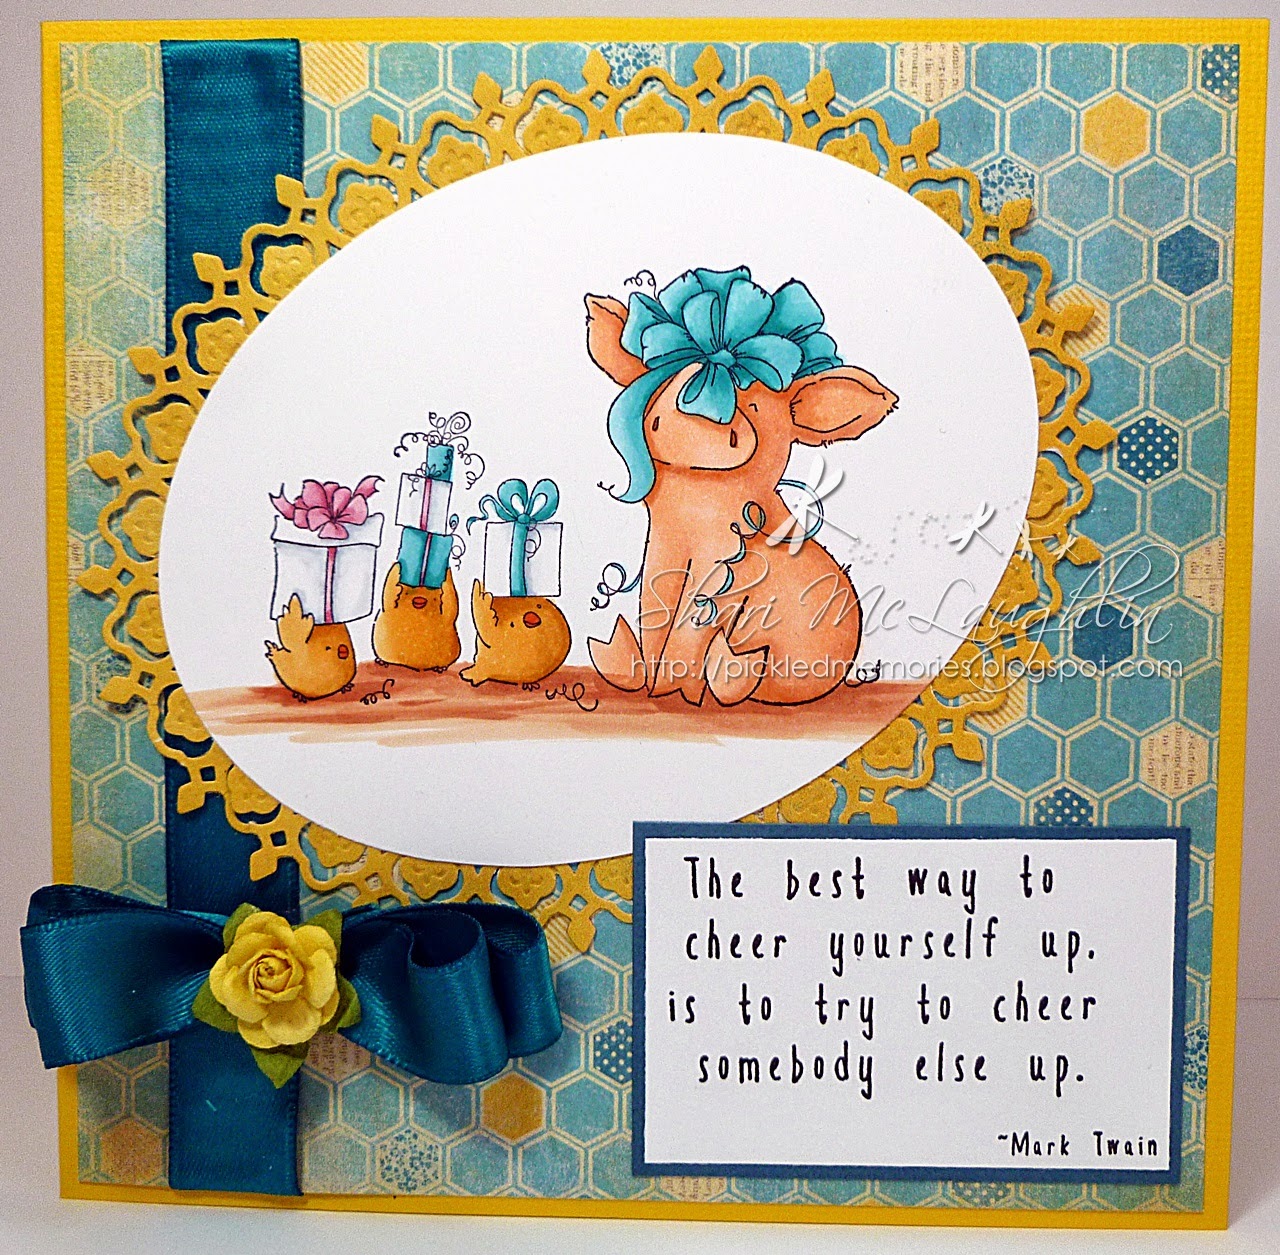
I simply adore these new images from Stamping Bella featuring Petunia the pig - who doesn't love an adorable pig!!

 
This cutie is Petunia Thinks She's a Prezzie and is available here at One Crazy Stamper.  I colored the image with Copic sketch markers, then cut it with a Spellbinder oval die, and matched that to one of the newer oval dies from Spellbinders to create the decorative border.  The sentiment is included with the image.  My dp is an oldie from my stash (Authentique), as is the ribbon and Prima flower.
 
Card Recipe
Petunia - E01, E11, E21, E97
Chicks - YR21, YR23, YR24
Bow - BG 53, BG 45, BG49
Whites - C1, C4
Ground - E11, E15, E21


Sunday, April 5, 2015

The More You....

Finally spent the day catching up on putting some recently colored images on to card fronts, and here is the first one - this stunning image is from Docraft's Simply Gorjuss Urban Rubber Stamps and is entitled "New Heights".

 
The image is colored with Copic markers, then fussy cut and adhered to the card front that features older Imaginisce paper and a Spellbinder diecut.  The wonderful sentiment is from Taylored Expressions "The Places You'll Go" stamp set, and the pearls in the corners were made with a Viva Décor Pearl pen.
 
Sugar Nellie - Gorjuss 2000 Party


Saturday, March 7, 2015

On Top of the World


It's a gorgeous day in southern Alberta today - the sun is shining and the forecast is for nothing but warm days ahead - so what better day to celebrate the coming spring season then to show you all a Gorjuss girl card.

 
This beauty is entitled On Top of the World and I have colored it with Copics, then cut and matted it with the Spellbinders die Labels One.  The sentiment is included with the image, while a Memory Box die and pearls made with a Viva Décor pearl pen finish off the card front.
 
Enjoy your day!!

Monday, August 4, 2014

Wedding News

I had a very special occasion happen late in June - my daughter and her fiancée shared their beautiful woodland wedding ceremony on their British Columbia acreage with family and friends!  What a gorgeous day of celebration!!

 
For the special day I made this beautiful card featuring one of my favorite Lili of the Valley images, colored with Copics. The card front features Memory Box dies, a Tattered Lace die, Prima flowers and pearls, a Spellbinder die, and designer paper and ribbon from my stash.


Saturday, June 14, 2014

Tool Time!!


Only one more day until we celebrate the special guy in our life's, our Dad's!
My card today features an adorable image from Stampavie that I have colored with Copics and then mounted on dp from My Mind's Eye.

 
The sentiment is computer generated, and the screw brad is from the local big box craft store.  I have also added some metallic details by painting Smooch Top coat Illuminate over all of the grey tools.


Saturday, February 1, 2014

Under the Sea!!


New month, new challenge theme for One Crazy Stamper, and this month we are looking for your ANYTHING GOES projects.  The design team has the chance this month to work with a wonderful sponsor, so all of our cards will feature images from HIGH HOPES STAMPS!

 
 My first card this month has the adorable "Willy's Sandcastle" image available here.  I have colored the image with Copics, then used Judikins Diamond Glaze to give the googles the look of glass.  To create the shaker card I have used several sizes of the Spellbinders circles dies, some acrylic and diamond dust, and 3d foam tape.  The dp is from Bo Bunny's Key Lime collection.

Card Recipe
Oranges - YR12, YR14, YR16
Reds - R22, R24, R27
Greens - YG11, YG13, YG17
Scuba Gear - BG53, BG45, BG49
Scuba Glass - BG13
Stars - Y19
Sand - E31, 34, 35
Bubbles - BG18
Background - BG11
 
 Hop on over to the design team blog and check out the rest of the teams creations.  All of the details to enter this month's challenge and the fabulous prize available to be won are listed there.
 

Tuesday, December 10, 2013

Metallic Chirstmas Tags


It's time for me to share a tutorial with you for One Crazy Stamper, and this month I decided to play with the Viva Décor Inka Golds.  This product comes in a variety of colors and the ease of use is wonderful!!   I have two techniques to show you, and there are lots of photos, so grab a cup of coffee, and enjoy!!! 
 
 
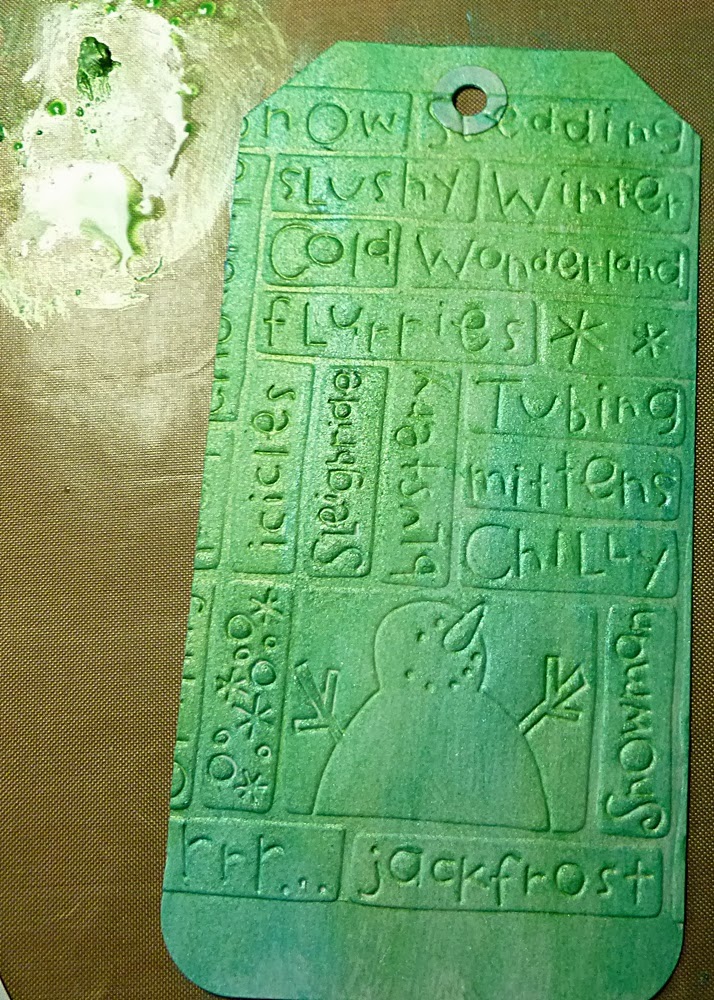
 I started by embossing tags with various Cuttlebug and Sizzix folders, then I placed a dab of two different Inka Golds on a splat mat.  By adding a small amount of water to the two colors I brushed over the embossed tags with random strokes of each color, blending them together.


Once the tag dried, I used a piece of paper towel to burnish the Inka Gold blended colors, giving the tag that metallic finish.


For the following tag, I first used the water technique with the Inka Gold, and then placed a mask of a large snowflake over the finished result.  By using the Inka Gold with my fingertip, I placed a heavier layer of the product on the tag front.


 After adding some other embellishments, here's the finished tags.


The next technique, uses the Inka Golds straight out of the jars to add metallic finishes to  various parts of a card.  Using the Grand Calibur, I cut and debossed one of the Spellbinders Imperial Gold Dies ( debossing is the effect of the design being pressed into the paper - not raised ).


I also used the Grand Calibur and a magnetic sheet to emboss all of the Spellbinder Imperial Gold Ivy dies onto a card front.  Using my finger I then rubbed the resulting pattern, highlighting the raised embossing.


To complete the card front I randomly rubbed two different colors of the Inka Gold to get a third color blend.

  
To finish off the card front I stamped a Penny Black Christmas sentiment from the Glad Tidings stamp set,with Staz - On ink in the center of the gold octagon ( after using the Inka Gold, you will need to use Staz - On to prevent smudging ).  I also stamped a Penny Black Christmas Wishes image and colored it with Copics.  A Memory Box die and some lace complete the card.
 
 
Grab some of these wonderful products over at One Crazy Stamper and have fun playing with them - oh yeah, clean up is so easy just some water and paper towels will clean up any mess any may make!
 

Tuesday, November 26, 2013

Hooray!!! It''s time for those Ugly Sweaters!!!


Tis the season for those lovely UGLY CHRISTMAS SWEATERS to be dug out from the back of your closet, and to be proudly worn for every one's pleasure.  My card today features this annual event with the use of the Art Impressions Ugly Sweater Stamp set

 
 After coloring the image with my Copic Sketch Markers, I used a Copic Multiliner to draw the lines on the bells back in, then fussy cut the image and mounted it on the inside of the card with an Action Wobbler.  The image is framed with a cut-out made with a Spellbinders die.  An older  Bo Bunny dp is the card front and inside.  The awesome sentiment is included with the image stamp. 
 
Card Recipe -
Reds - R22, R24, R27
Greens - G84, G94, G99
Lips - R27
Skin - E51, E53, BV000
Hair - C6
Pants - B01, B02, B04
Gold Metallic Pen   
 
You still have a couple of days left to enter the monthly challenge at One Crazy Stamper with your Christmas themed project.

Tuesday, November 12, 2013

Winter White


Time to create an all white card with the monthly theme from One Crazy Stamper of Christmas.  I don't make all white cards very often, but when they turn out as well as this one did, I often think why not do this a lot more!


The card starts with a white card base layered with a front created by using a Sizzix embossing folder to create depth.  Over that I have layered a white ribbon, and a Spellbinder die shape that features an all white Memory Box die called "Glowing Candles".  The sentiment was stamped with Versa Mark embossing ink, then embossed with a white emboss powder, while the edges were lightly inked with a silver ink pad.  Simple yet elegant!